useClient
If you've done Sanity development before App SDK, it's remarkable to think how complex of an application you've used without ever needing to access the Sanity Client directly.
Thankfully, however, if we have needs that the App SDK doesn't provide, we can always reach out and grab the Sanity Client to take control of our own destiny.
Currently, the sentiment editor is not very intelligent. It requires a human to read the feedback and spend mental cycles processing whether it is positive, neutral, or negative.
This is no longer a job for humans; this is a job for AI. Sanity Client contains AI Agent Actions which are just the tools we need.
In the previous lesson you deployed the Studio. This should have also deployed your Studio's schema types—which are required by Agent Actions.
You can list your deployed schemas from the command line:
# inside the /studio foldernpx sanity@latest schema list You should see at least one schema deployment. If not, try deploying now.
# inside the /studio foldernpx sanity@latest schemaYou'll now update the Sentiment component almost entirely. Instead of the value being edited by a user selection, clicking a button will hand the work off to the Agent Action.
Note: In reality this might be better performed in a Sanity Function so it is automated, instead of waiting for user action.
Sentiment component to call an Agent Action.import { DocumentHandle, useClient } from "@sanity/sdk-react"import { Text, Inline, Stack, Button } from "@sanity/ui"import { useToast } from "@sanity/ui"type SentimentProps = { feedback: string value: string handle: DocumentHandle}
function titleCase(str: string) { return str.replace( /\w\S*/g, (txt) => txt.charAt(0).toUpperCase() + txt.slice(1) )}
const SCHEMA_ID = "_.schemas.default"
export function Sentiment({ feedback, value, handle }: SentimentProps) { const client = useClient({ apiVersion: "vX" }) const toast = useToast()
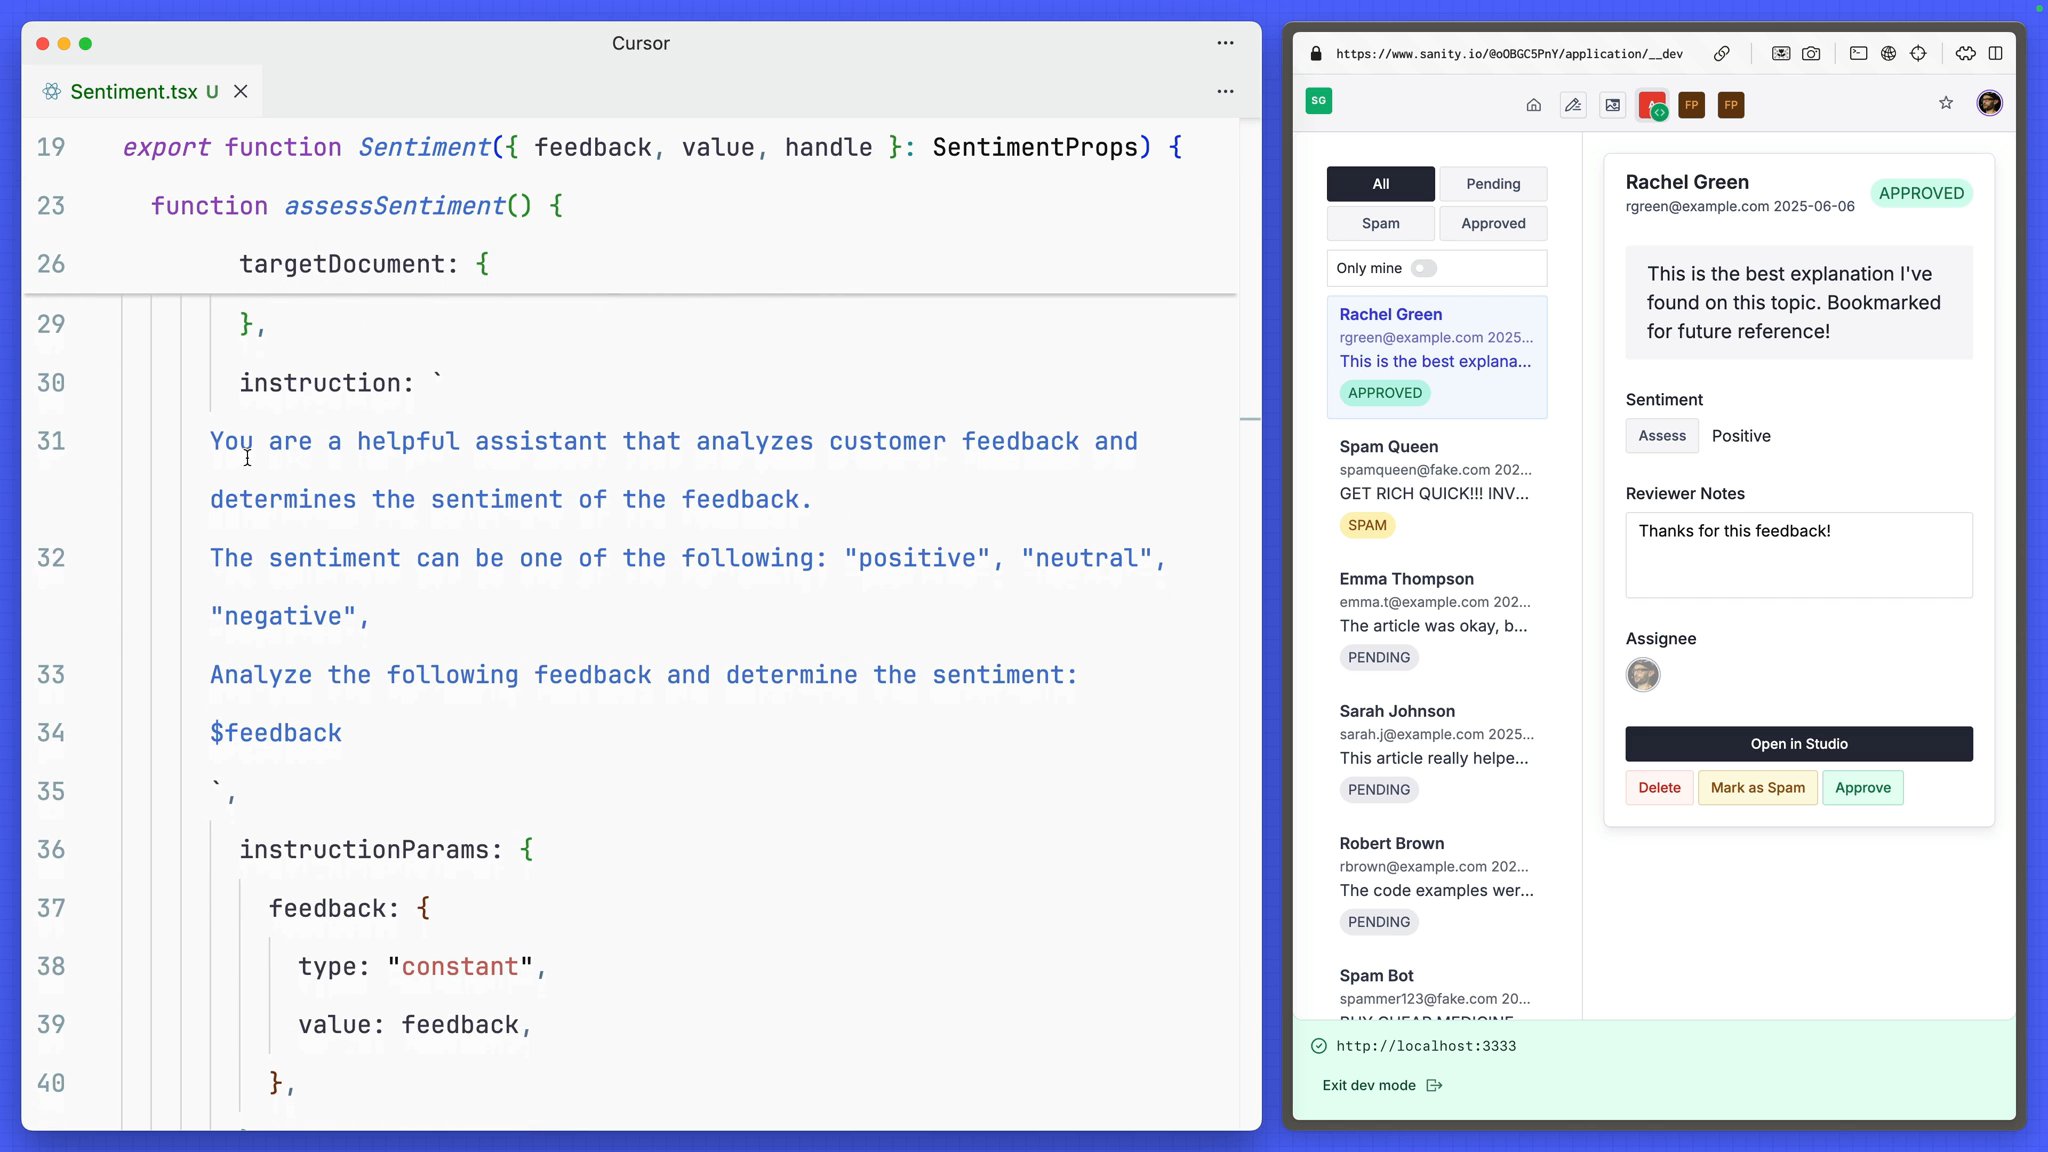
function assessSentiment() { client.agent.action .generate({ targetDocument: { operation: "edit", _id: handle.documentId, }, instruction: ` You are a helpful assistant that analyzes customer feedback and determines the sentiment of the feedback. The sentiment can be one of the following: "positive", "neutral", "negative", Analyze the following feedback and determine the sentiment: $feedback `, instructionParams: { feedback: { type: "constant", value: feedback, }, }, target: { path: "sentiment", }, schemaId: SCHEMA_ID, }) .then((result) => { toast.push({ title: "Sentiment assessed", description: result.text, status: "success", }) }) .catch((error) => { toast.push({ title: "Error assessing sentiment", description: error.message, status: "error", }) }) }
return ( <Stack space={3}> <Text weight="medium">Sentiment</Text> <Inline space={3}> <Button mode="ghost" onClick={assessSentiment} text="Assess" /> <Text>{value ? titleCase(value) : ""}</Text> </Inline> </Stack> )}You'll also need to pass down the content of the feedback into this component, so it can be used as a parameter in the Agent Action.
FeedbackEdit component to pass feedback down to Sentiment as a prop<Sentiment value={sentiment} handle={selectedFeedback} feedback={content}/>Now with any feedback document open you can click the "Assess" button and save yourself the decision making fatigue of determining user sentiment.
Your app is now feature complete! Let's deploy it to the world.